Basics
Flux LoRA
In this chapter, we will introduce how to use Flux LoRA to adjust the image style.

This image is generated by AI
1. Download Flux LoRA Model
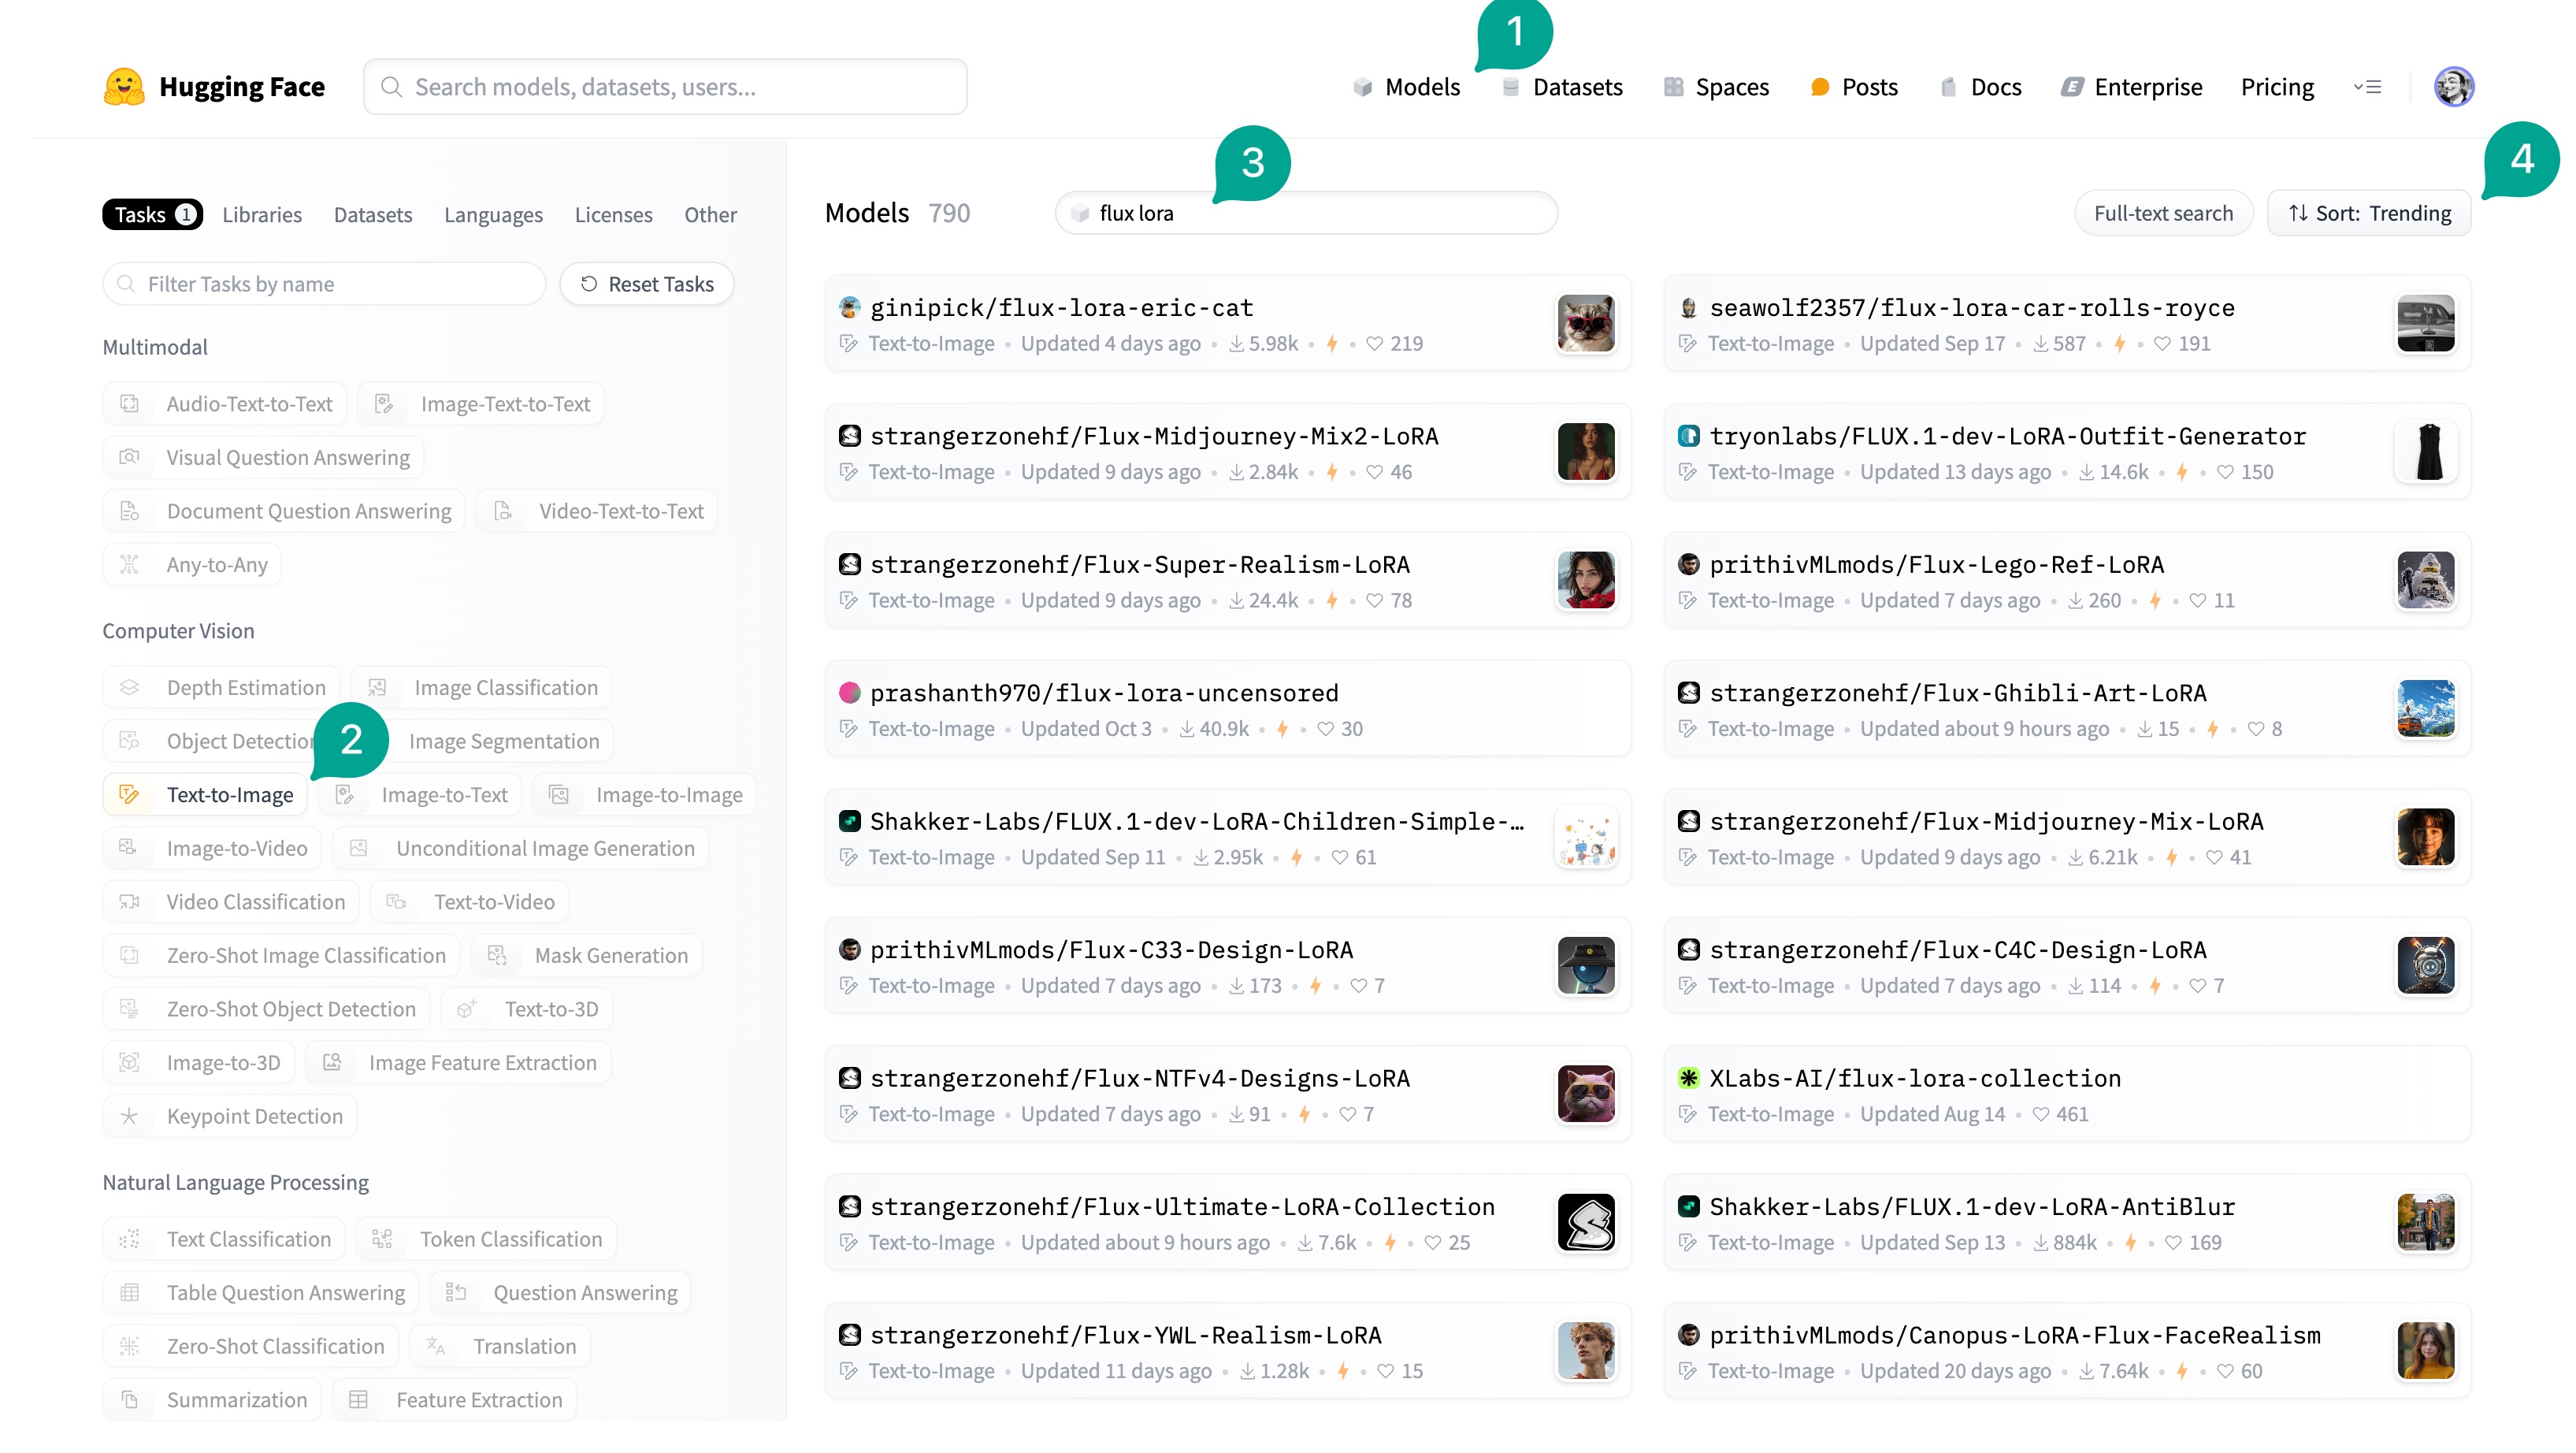
There are many Flux LoRA models, most of which are shared on Hugging Face. You can find them through the search function on Hugging Face. However, the search function on Hugging Face is not very good, you can search and filter through the following methods:- Click the
Modelsbutton at the top. - Click
Text to Imageon the left. - Then, enter
flux lorain the search box on the right. This will give you all Flux LoRA models. - Finally, you can click the
Sortbutton on the right to switch the sorting method, such asMost Downloads.
Files and versions button (① in the figure), then download the LoRA file (② in the figure). Then put the file in the /models/loras directory.

2. Flux LoRA Workflow
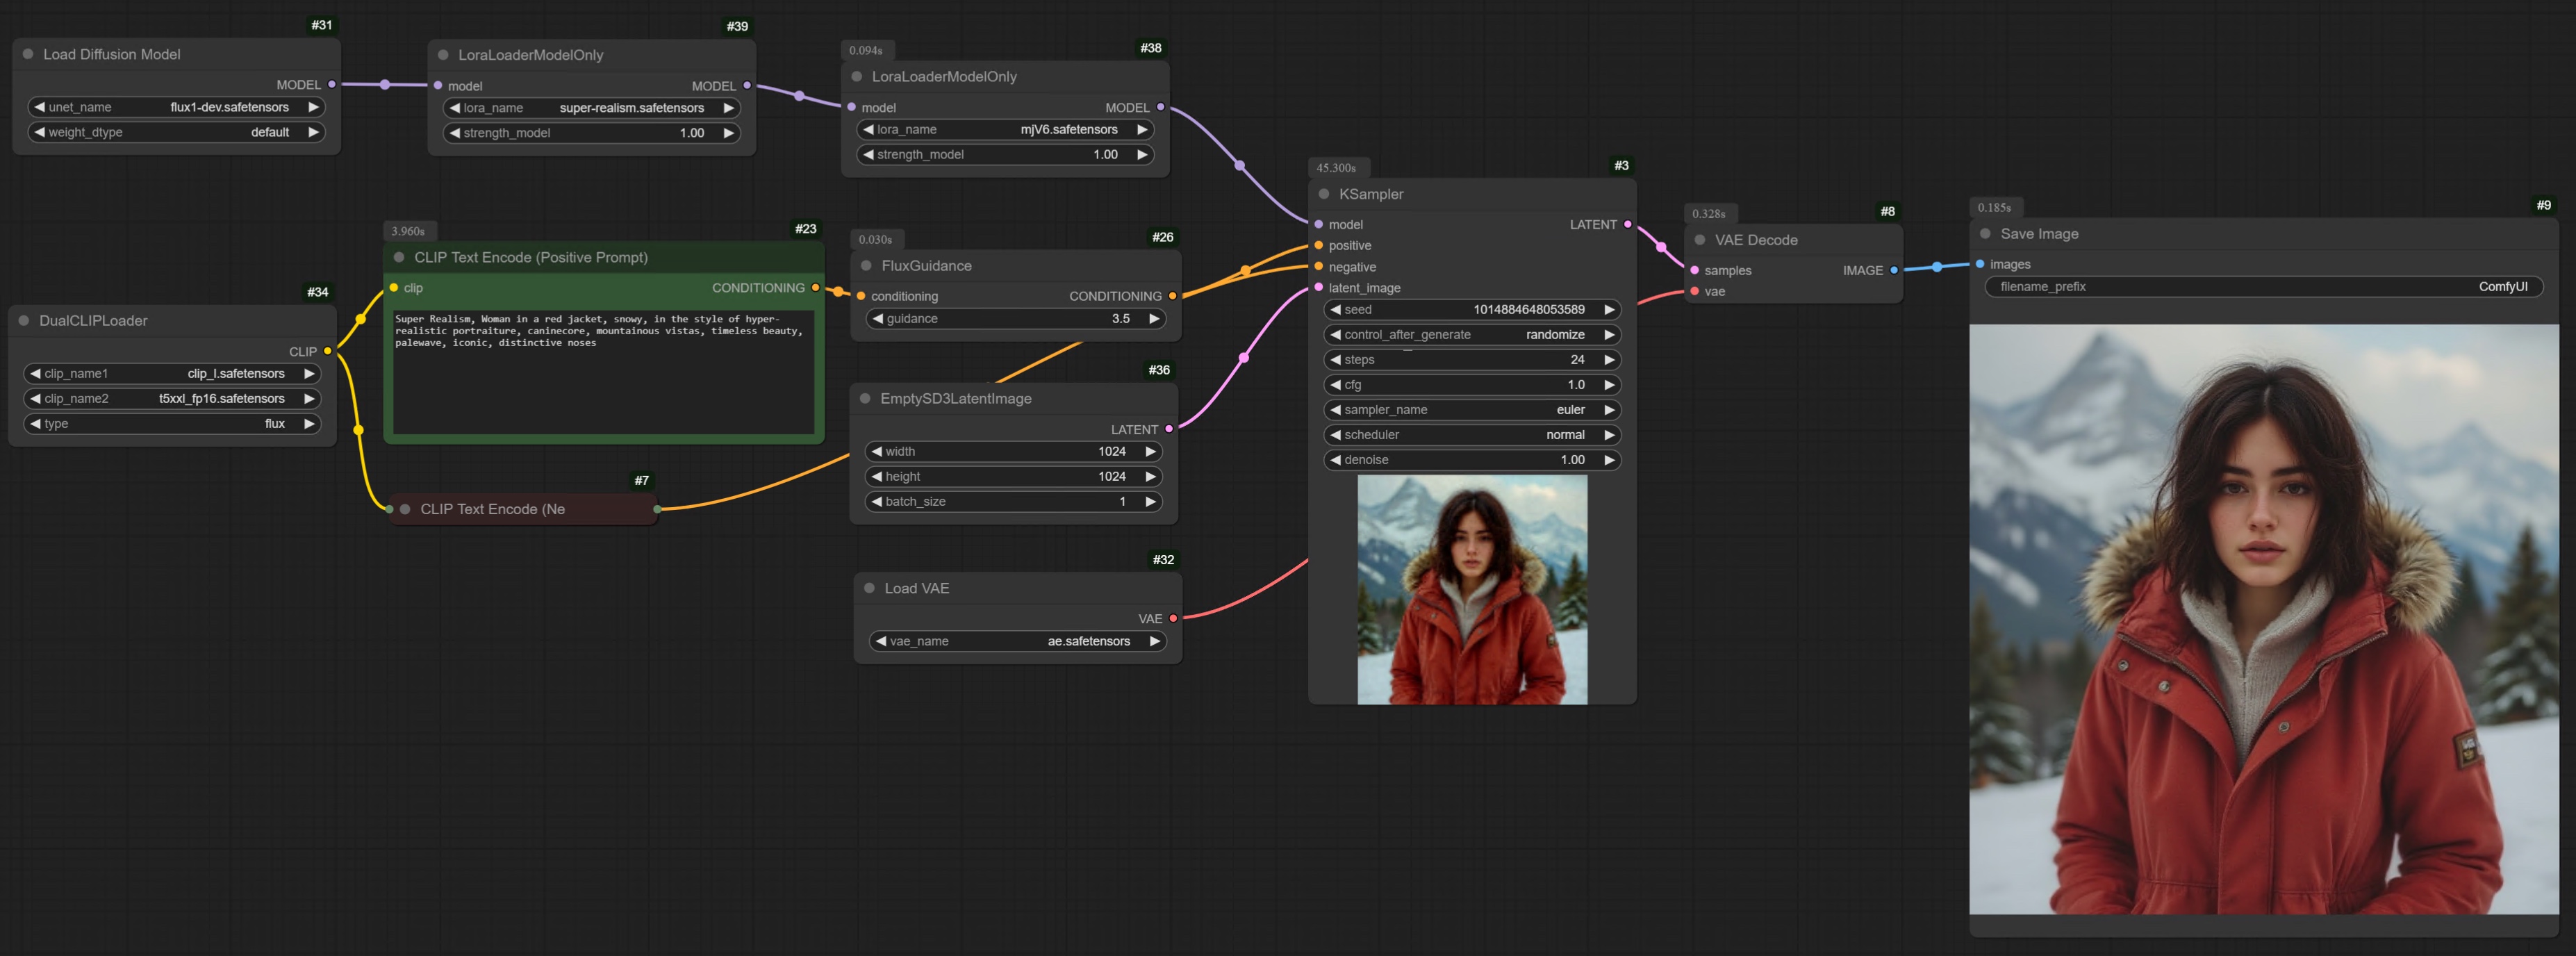
After downloading the model, let’s build the Flux LoRA ComfyUI workflow. First, you can load the full Flux workflow I recommended in Flux ComfyUI Workflow, and then modify it based on this workflow. Or go to Comflowy to download this workflow and use it. The changes are relatively small, you just need to add aLoraLoaderModelOnly node (① in the figure), note that it is LoraLoaderModelOnly rather than LoraLoader. Because we only need to load the LoRA model, not the Clip model.
Then, select the Flux LoRA model you downloaded, you can adjust the strength of the LoRA model on the image generation by setting the strength_model parameter (② in the figure), the higher the value, the greater the impact. You don’t need to add any parameters related to LoRA in the Prompt, doing this has almost no effect.

Flux Dev App
Using this app, you can generate a single image in around 8 seconds.
Flux ComfyUI Workflow Template
Click the Remix button in the upper right corner to enter the workflow mode.
3. Chain Multiple LoRA Models
Besides chaining a LoRA model, you can also chain multiple LoRA models. This way, the two LoRA models will stack up to affect the image generation, thus generating images that are more aligned with your expectations. Just add multipleLoraLoaderModelOnly nodes, then select the Flux LoRA models you downloaded. For example, in the workflow below, I added two Flux LoRA models, one is Flux-Super-Realism-LoRA, the other is Flux-Midjourney-Mix2-LoRA. The former makes the generated images more realistic, and the latter makes the generated images more similar to Midjourney. The image will look more exquisite, and the visual style will also be better.
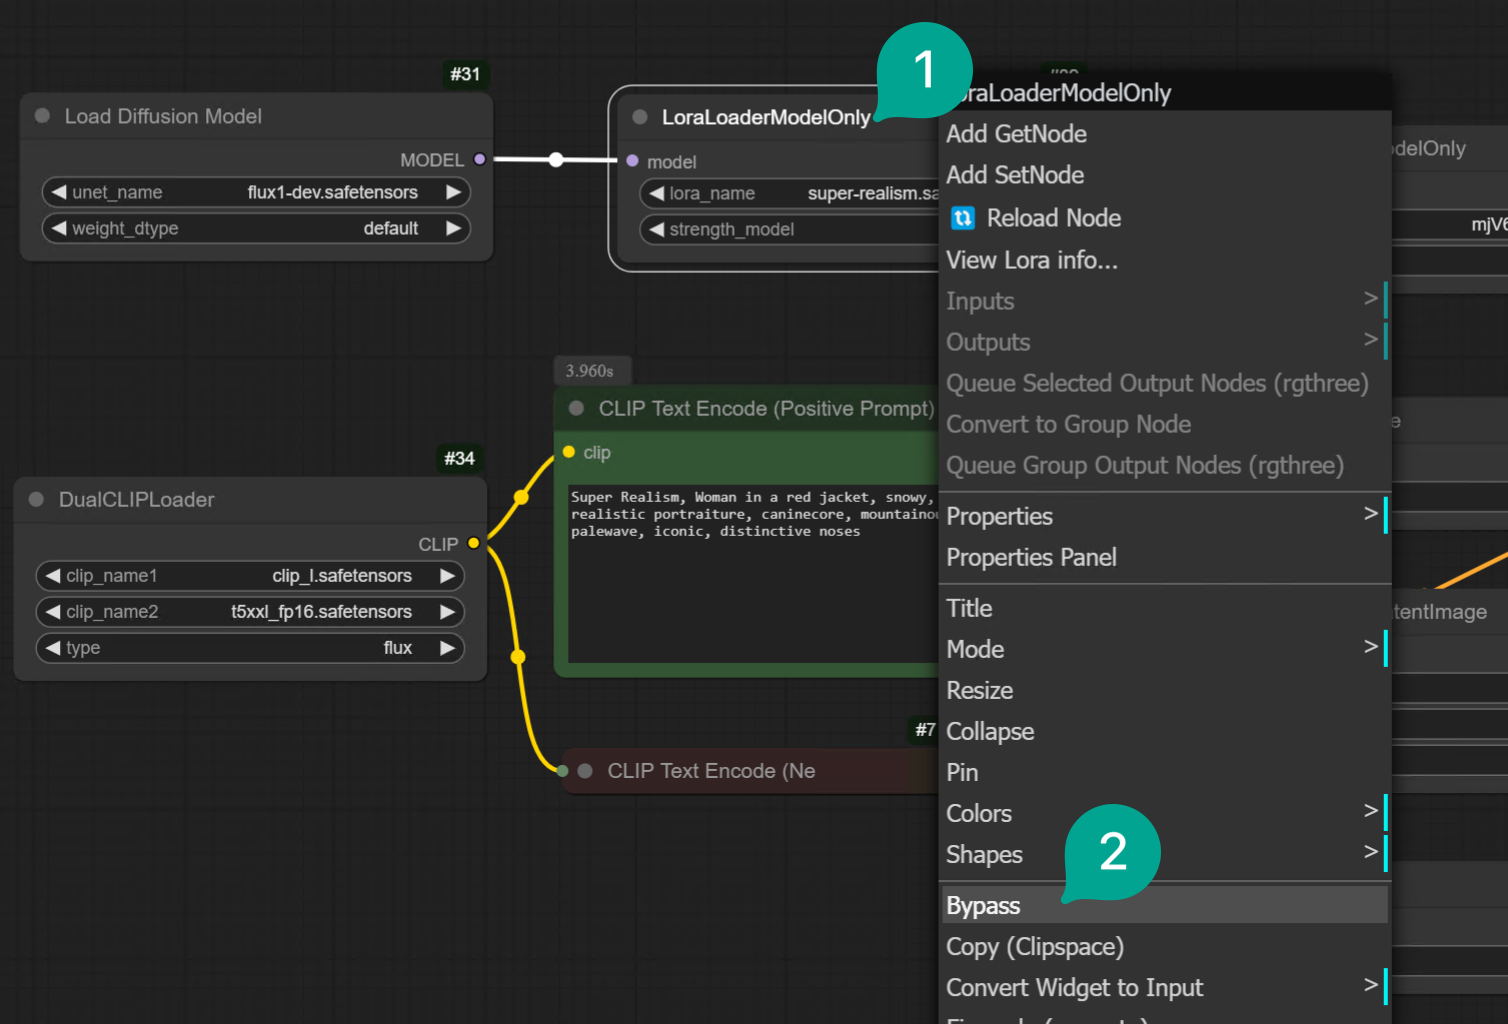
LoraLoaderModelOnly node and selecting Bypass. When you don’t need a LoRA model, doing this is much more convenient. No need to delete the node and reconnect: